Booking Guide
If you want to book an appointment you will need to find the day on the Calendar on the booking page by using the navigation tools shown below. The arrows going to either side in the middle of the page allow you to navigate between the months, you can also select if you want to see the booking calendar in Month’s, Weeks, Days or based on the agenda’s. The easiest to use would be monthly since you can view all the needed info and this guide will be for using the month setting.

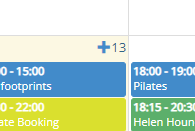
Now you find the day you want to book on the calendar, then you need to press the blue + in the corner of the day which will take you to the booking page.

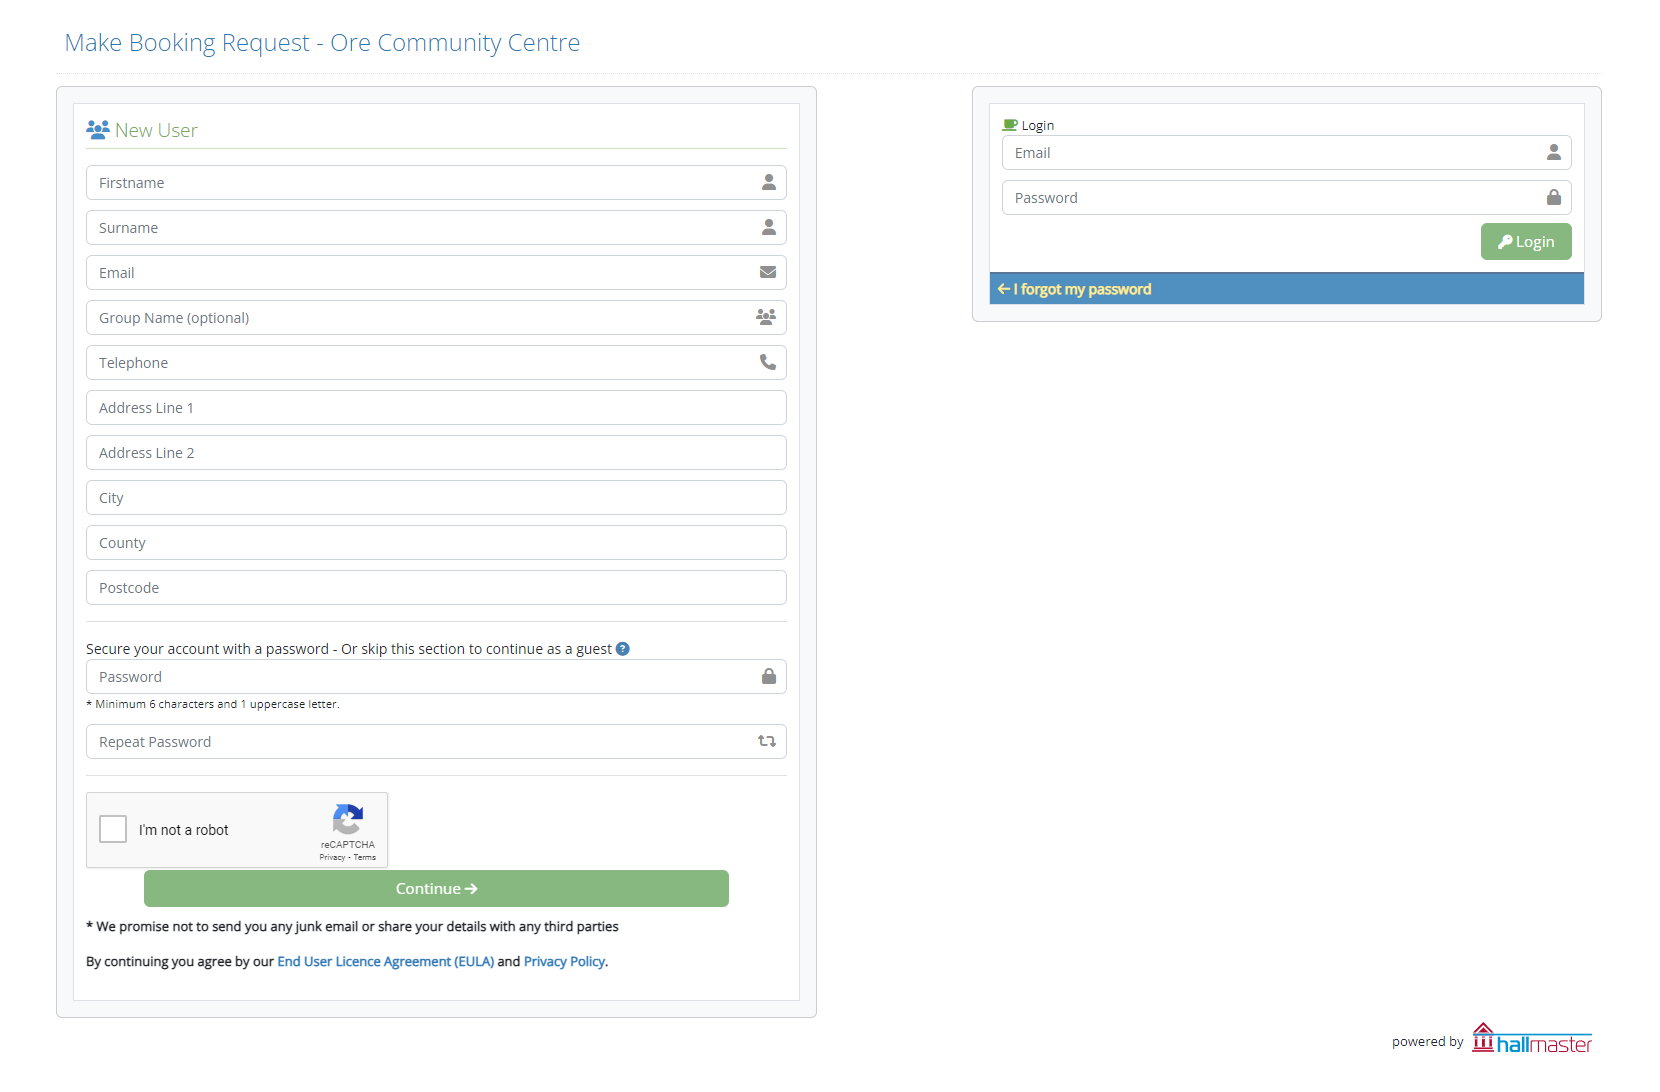
You Should go to a page that looks like this. If you already have an account, you can use the login option to the right. Otherwise you can fill in the “New User” form to the left. Once you have filled it out, you will be taken to this page:

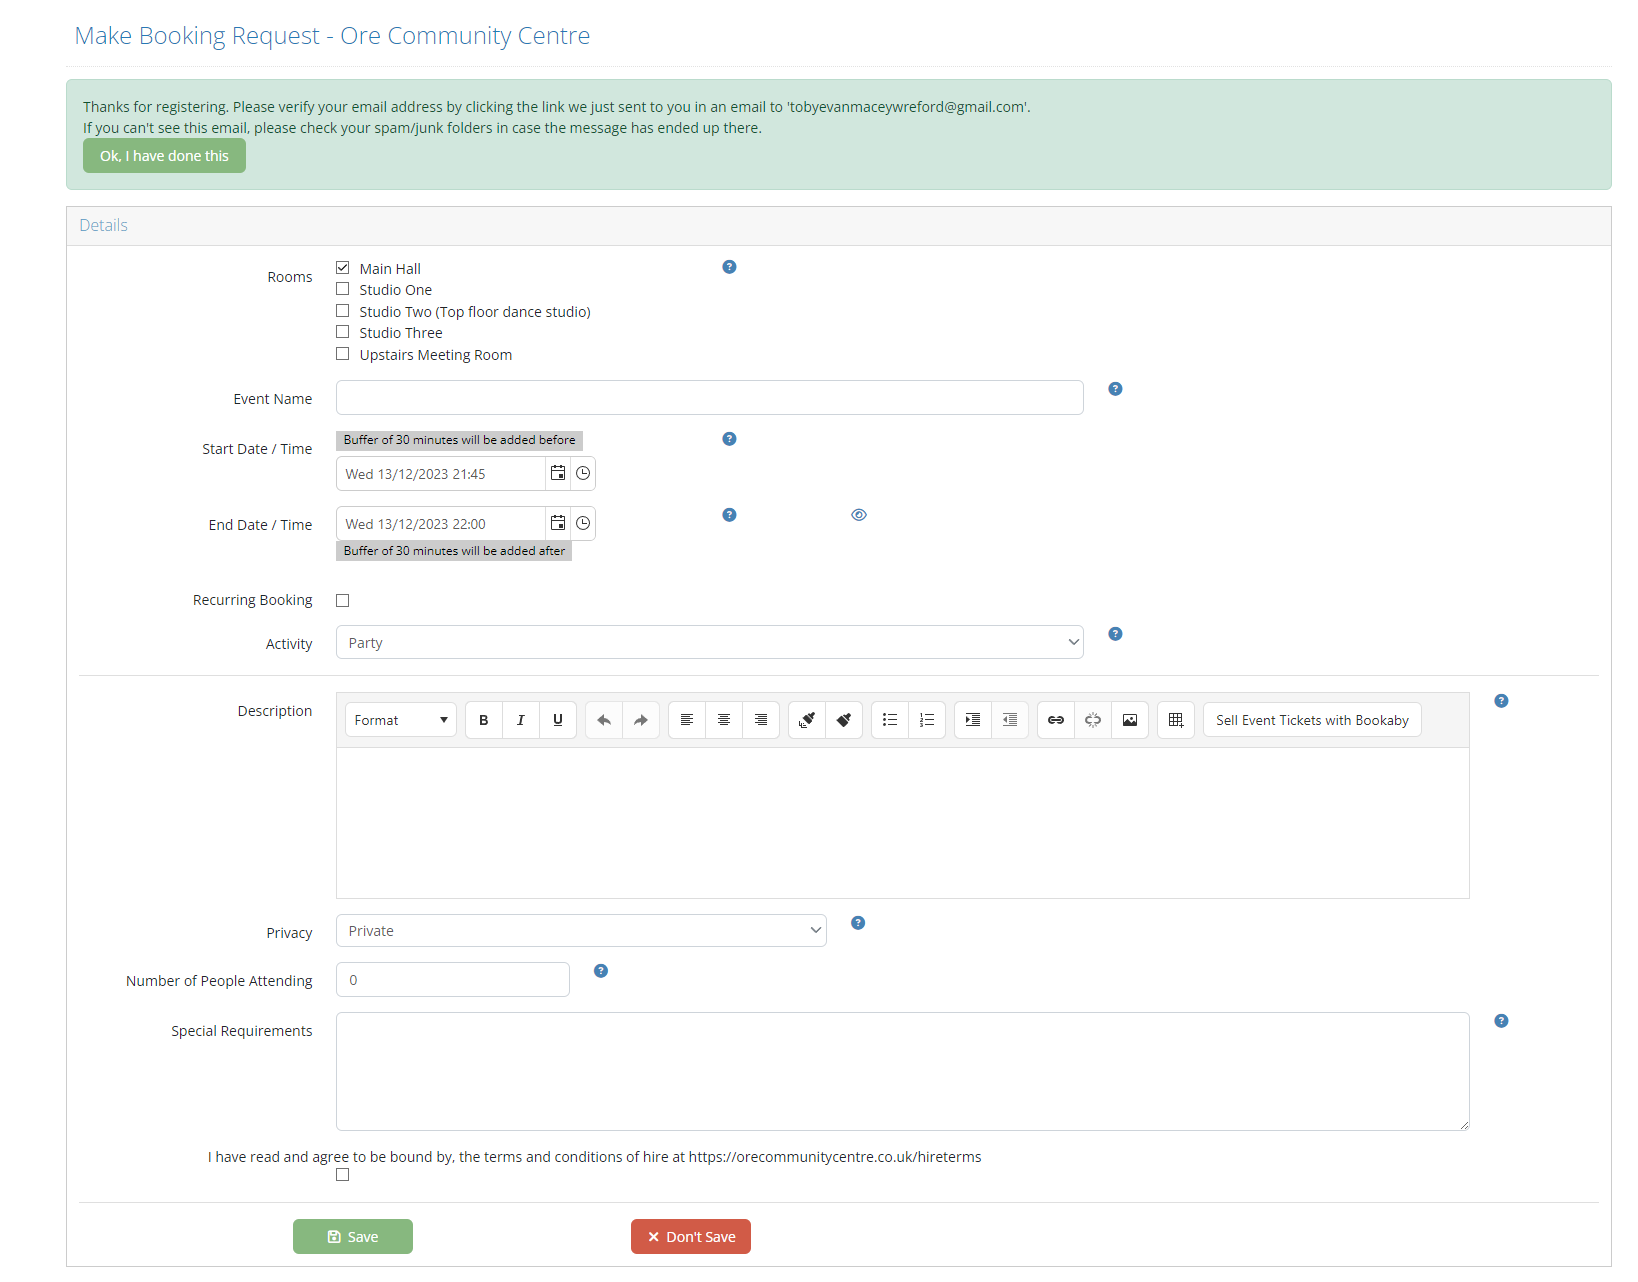
When that is completed, you can then verify you’re account by signing into the provided email address and find the verification email and clicking the provided link. Then as shown in the image below, you can then select the desired room, create a name for the event, which should just act as something that describes the event, such as a Birthday Party or a Dance Club for example. The event start time and date and the event end time and date, whether it is a recurring booking, for clubs which will then ask if it has additional dates or how often you want to recur it. Then the type of event. The ones we have are: “Party”, “Meeting”, “Group” or “Classes”. Choose the one that applies to you. Then provide a description of the event, select the privacy, it will be displayed if private is not selected so if you don’t want your information of the event to be accessible, select private. Then if you have any special requirements, please write them in the assigned section for our attention. Then tick the agree box for the terms and conditions and save the booking.

Now you’re booking should be complete.
